Monday, July 26, 2010

DBMoto - MultiServer Synchronization

DBMoto 7 - MultiServer Synchronization setup
1. Start DBMoto Management Center from Start->Programs->HiT….

2. Create a New connection from Source folder.

3. Click Next button to continue.


4. Type the source name and choose the Database in the list box.


5. Specify the connection parameters for the source connection. Click Test button to confirm the connection parameters are correct.


6. For Transactional replication, to tick the checkbox and provide the sysadmin privilege user ID and password.

7. Select a Database tables you want to replicate. Click Next button to continue.

8. Click Finish button.

9. If you want to add additional tables in the source connection, Click the Select Tables… option.

10. Select a tables what you want in the list.

11. Choose the Targets option in the folder and click Add New Connection…

12. Click Next button to Continue.

13. Type the target connection name and specify the Database name. Click Next button to continue.

14. Type the connection parameters for the target connection. Click Next button to continue.

15. Check the option and click the Verify button. Click Next button to continue.

16. Click OK button to upgrade DBMotoLIB.

17. Click Install button.

18. Click Yes button.

19. Click Next button to continue.

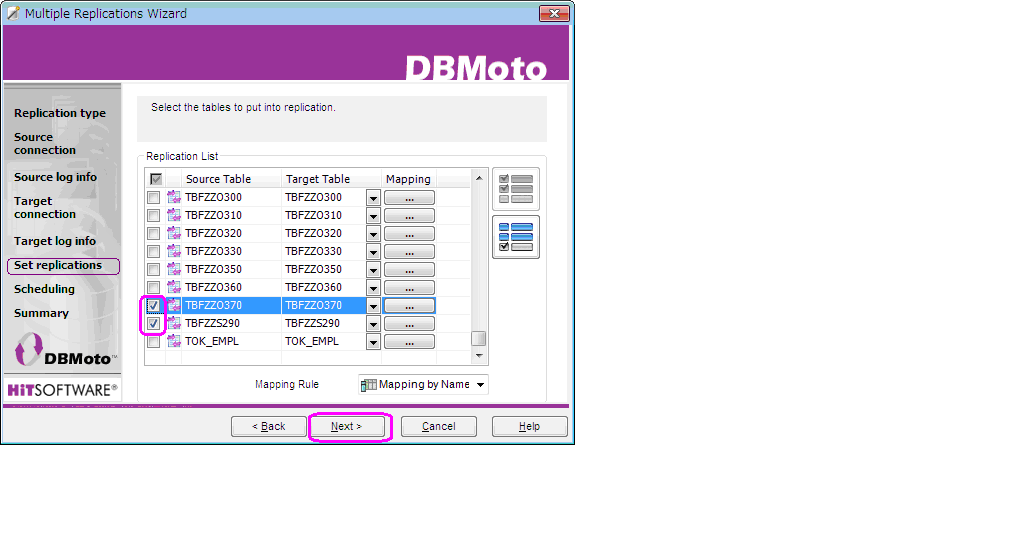
20. Select a tables what you are going to replicate. If you want to create new tables, just leave it blank. Click Next button to continue.

21. Click Finish button.

22. Follow the screen to create a target table.


23. Click Next button to continue.

24. Select a source table to be copied. Click Next button to continue.

25. Select the target connection and define the target table name.

Click Next button to continue.

26. Click Next button if you don’t want to change datatype.

27. Click Next button to continue.

28. Click Finish button.

29. Click Yes to add the created tables in the target table list.

30. Similarly create another two connection and select a tables.

31. Create Multiple Replications… option in the source connection list.

32. Click Next button to continue.

33. Select Synchronization in the Replication Mode. Click Next button to continue.

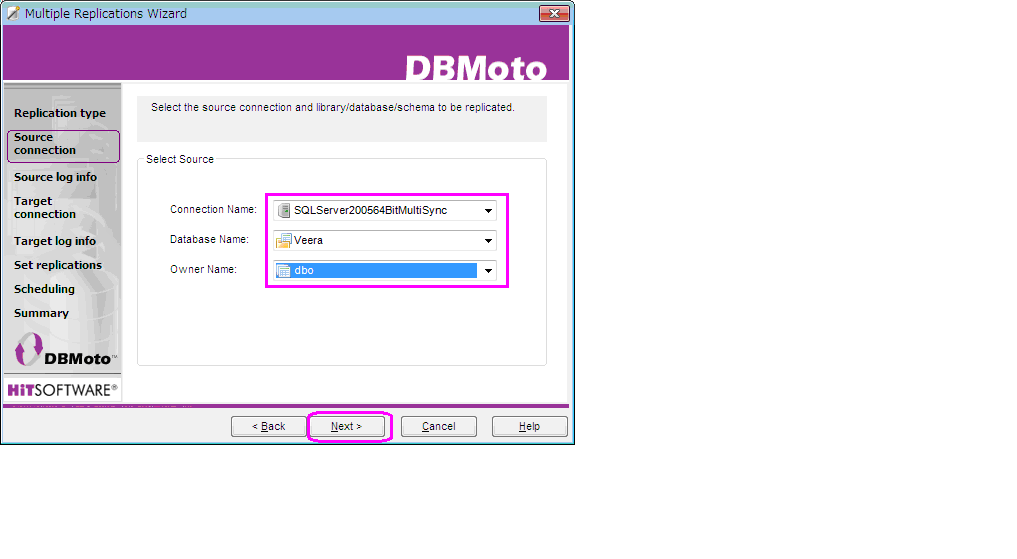
34. Select the source connection and library/database/schema to be replicated. Click Next button to continue.

35. Set the correct transaction ID to read transaction from SQLServer.

36. Click Next button to continue.

37. Select Connection Name and Library Name. Click Next button to continue.

38. Set the correct journal/receiver from the iSeries Server.

39. Click Next button to continue.

40. Select tables to replicate and Click Next to continue.

41. Click Next button to continue.

42. Click Start button to continue.

43. Click Close button.

44. Specify the Replication Mode as Synchronization, Click Next button to continue.

45. Specify the source connection database what you are going to replicate. Click Next button to continue.

46. Click the read button to set the transaction ID. Click OK button in the dialog box.

47. Specify the target connection to be replicated. Click Next button to continue.

48. Click Read button to set the transaction ID. Click OK button.

49. Click Next button to continue.

50. Specify the tables to put into replication. Click Next button to continue.

51. Click Next button to continue.

52. Click Start button to create replications.

53. Click Close button to continue.

54. Create a New Multiple replication for Synchronization. Click Next button to continue.

55. Select a Source connection to be replicated. Click Next button to continue.

56. Click Read button to set the transaction ID. Click OK button to close the dialog box.

57. Click Next button to continue.

58. Select a target connection to be replicated. Click Next to continue.

59. To set the transaction ID from Oracle redo log. Click Next button to continue.

60. Click Next button to continue.

61. Select tables what you want to replicate. Click Next button to continue.

62. Click Next button to continue.

63. Click Start button to continue.

64. Click Close button.

65. Create a New group for MultiServer Replication.

66. Type the Group Name and click Next button.

67. Select a replication to insert into a group. Click Next button to continue.


68. Click Finish button to complete the wizard.

69. Click Yes button.

70. Start a DBReplicator from System tray or from menu.

71. Confirm the replication process in the monitor.


--------------------------------------The End-------------------------------------------

Regards,

Veera,

Product Support Engineer,

http://www.climb.co.jp

----------------------------------

For More Information

http://www.hitsw.com/products_services/dbmoto.html


Tuesday, July 6, 2010

EspressReport Vs Jasper Report

1. Jasper reports are not user friendly reporting tool. It needs an ant tool to compile, run the application.

EspressReport is a user friendly application. Anyone can create the report without knowledge for Java. It didn’t need any third party tool to compile/run applications.

2. Jasper reports can be exported into the following formats.

PDF, HTML, XLS, RTF, ODT, CSV, TXT or XML document.

EspressReport: Run reports in applets or generate HTML/DHTML, PDF, Excel, RTF, XML, text or CSV files.

3. Jasper provides only for the JDBC connection.

EspressReport: JDBC, JNDI, SOAP and Sales Forge

4. Jasper Report Supports data sources are Database, Java Class, CSV and XML files.

EspressReport: Draw data from databases, XML files, Text files, and Java arrays/objects/classes/EJBs. Unique Data View feature allows easy database access/querying.

5. Jasper only provides the Summary report and Crosstab reports.

  EspressReport: Simple Columnar, Summary Break, Crosstab and Master & Detail report

6. Jasper Report supports the following charts

Pie, Pie 3D, Bar, Bar 3D, XY Bar, Stacked Bar, Stacked Bar 3D, Line, XY Line, Area, XY Area, Scatter Plot, Bubble, Time series, High Low Open Close, Candlestick.

EspressReport provides 2D Column ,3D Column,2D bar,3D bar,2D stack bar,3D stack bar,2D stack column,3D stack column,2D area,3D area,2D stack area ,3D stack area,2D line,3D line,2D pie,3D pie,2D scatter,3D scatter,2D High Low,3D High Low,2D HLCO,3D HLCO,2D 100% Column, 3D 100% Column,3D Surface,2D Bubble,2D Overlay,2D Box,2D Radar, 2D Dial,2D Gantt and 2D Polar .

7. Jasper didn’t provide the web service technology for the developers.

EspressReport provides the web service technology for the developers.

8. Jasper report: Anti-alias feature didn’t support for the charts

EspressReport provides the Anti-alias support for the charts.


Thanks,Publish Post

Veera

http://www.climb.co.jp

http://www.quadbase.com